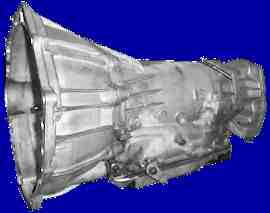
4L60E Repair
Guide -
Home
WELCOME
If you are reading this, there is a good
chance that your transmission has no reverse, drives in 1st, does not
drive in 2nd, drives in 3rd, and has no drive in OD. There is
likely no
MIL or “Check Engine” warning lamp on, but there may be a light and an
error code for a general transmission performance problem. The
transmission
engages in DRIVE normally with no delay, may have a slight pump
whine/howl at idle in park/neutral. If that is why you are
reading this, it's likely your transmission has slipped a hub on
reaction sun shell. For a fairly thorough repair of the problem,
plan on about $250 in parts and three-five full days duration of
repair. I've been through this a handful of times. The last
time, I decided to do it (with the cooperation of the owner) on jacks
and stands, with no air tools or special tools, and with no
assistance. This is the manner in which a typical vehicle owner
would perform the repair. Standard Flat Rate for the removal,
repair, and installation in a Blazer/Jimmy with 4WD is 19.4 hours in a
worst case scenario and in a fully equipped shop. This method
required more
than 32 hours, not counting chasing parts and supplies. Needless
to say, I wouldn't be very profitable this way, but a learning
experience is almost always worth the journey.
This information is not intended to supplant or supercede that which is
published in commonly available service manuals. It is merely
anecdotal information presented to clarify the procedures and
directions found in published manuals and instructions. Anyone
undertaking a transmission repair is strongly urged to acquire a
thorough repair manual and review it fully. Most of the
images contained within the pages are thumbnailed and can be viewed in
a larger format by simply clicking them. While by no means
complete, this will hopefully familiarize readers enough to have a
general understanding of the procedures involved.
PREPARATION
Having an adequate selection of good hand tools is all that is
necessary. A transmission jack, floor jack, and four secure jack
stands are a requirement. Without the necessary hoisting and
holding equipment, this type of repair should not even be
considered. If you have an assistant, you may be able to wrestle
the transmission out without a jack, but it is far safer and easier
with an appropriate jack. I cannot even imagine trying to install
the transmission otherwise.
The only potentially “special” tools
necessary will be a long extension bar or enough shorter extensions to
reach 20" to 30" up and over the transmission. A good quality
T-45 Torx bit and driver are essential - Ideally it will be a Torx Plus
bit, but a good quality Torx will work if used carefully. A
flexible-head
ratchet will be very useful, but not absolutely necessary. A
torque wrench calibrated to at least 55 ft/lb will be necessary.
A band clamp of at least 9" in diameter (or an improvised series of
large hose clamps) will be very helpful for pump assembly.
A magnetic pick-up tool will be useful. An oil suction gun is not
absolutely necessary, but will make the job cleaner and easier.
Additionally, having a good vehicle
service manual AND a transmission repair manual (like an ATSG, Helms,
or Motor/AllData manual)
for the vehicle and transmission at hand is strongly advised. The
minimal cost of a repair reference will more than pay for itself in
potential problems avoided. If you must choose between the two,
the transmission manual will be the better investment.
You will need a sturdy workbench to
perform the transmission repairs. The work area should be kept as
clean and dust-free as possible, since contaminants in the transmission
hydraulics, bearings, and seals will reduce the longevity of your
repairs.
You will need a good supply of
towels, rags, or wipes to clean and dry parts. Avoid use of any
granular absorbents (such as OilDri or cat litter) since the clay dust
created by these products will adhere to the oily transmission parts
and ruin your repair as quickly as throwing a handful of sand into the
oil pan. Disposable paper towels are actually good for this,
since they tend to leave very little lint behind, and any lint which
does remain is soft, non-abrasive, and is easily trapped by the filter.
Good lighting under the vehicle will
be essential.
A large oil catch pan will be
necessary to contain the oil drained from the transmission (and
transfer
case on 4WD models) while under the vehicle. Newspapers will be used to
protect the
work surface and absorb oil which will drain out of the transmission as
parts are removed. They can also be used under the vehicle to
absorb drips and leakage without creating harmful dust.
A small jar of TransGel or petroleum
jelly (Vaseline or equivalent) will be necessary to assemble the
transmission. At least one quart of the appropriate clean
transmission oil should be available for coating seals and contact
parts as they are assembled, and to pre-soak any new clutch plates
which are installed. A
new transmission filter and at
least twelve additional quarts of the appropriate transmission oil
(currently
Dexron III) will be
necessary. If the vehicle is AWD or 4WD, two liters of GM
AutoTrak II (P/N 12378508) oil will be required.
PARTS and UPGRADES
At a minimum, the hard parts
necessary will include a replacement reaction sun shell, a pump
bushing, a new transmission filter, and a seal kit. This repair
can usually be completed successfully with only those parts.
However, given the time and effort required to remove the transmission
and disassemble it, additional parts which will enhance the reliability
of the transmission are worth considering. The reaction sun shell
problem is so common that the aftermarket has offered a replacement
unit which is substantially thicker and stronger than the factory
units. The cost differential is usually only a few dollars for
the heavier shell, so unless the repair is being performed in a
dealership or factory repair facility required to use original parts,
the replacement GM shell should not even be considered an option.
After the reaction sun shell, the next common weakness found in these
transmissions used under heavier loads is the 3-4 clutch
assembly. Stock transmissions may have five or six clutch plates
and the necessary compliment of clutch steels (discs) required to make
the assembly the proper thickness. Later factory versions and
aftermarket heavy duty kits provide up to nine clutch plates and
steels, greatly improving the holding capacity of the clutch
assembly. The relatively reasonable cost of a new set of plates
and steels is
probably worth the expense if the vehicle is used for
towing, hauling, or other heavy-duty or high-performance use, the
heavy-duty 3-4 clutch pack is advisable. These have additional
plates and steels and provide superior clamping at the same pressure
for greater power throughput. A commonly available arrangement is the
Raybestos "Z-Pack" seven-disc clutch kit, as well as many others.
If the transmission has near or over
100,000 miles, or has been used for heavy hauling or towing, an
assortment of other clutch plates, clutch steels, thrust bearings, a
separator plate and gaskets, pump vanes, a replacement band, and thrust
washers and
bushings should be available. If any slippage in second had
occurred prior to the failure, the band should likely be
replaced.
As an upgrade for higher RPM applications, roller thrust bearings are
available to replace the plain thrust washers found in several
locations throughout the assembly. Additionally, a high RPM pump
is available for continuous use over 5,500 engine RPM.
The forward sprag can also be a
wear item, and should be available. At a minimum, the existing
forward sprag should be disassembled and inspected closely for roller
and race damage. If the transmission is subjected to heavy use,
an upgraded, full-complement roller forward sprag is strongly advised.
There are upgraded apply pistons for the forward clutch and 3-4 clutch
within the input drum assembly, along with the necessary revised spring
retainer.
There is a later model factory change from a four-pinion gear planetary
set to a five-pinion planetary set at standard ratios, and this gear
set is markedly more robust than the four pinion assemblies. If the vehicle application is a lighter
weight, higher performance type, a lower ratio 1-2 planetary gear set
is available to decrease
the first gear ratio from 3.06:1 to 2.66:1 for improved acceleration.
These units also have five pinion gears as opposed to the original four
pinion design of the transmission.
If the torque
converter has
high
mileage, has experienced heavy use, or if the transmission has
excessive contamination from damaged or worn parts, it may be better to
replace it with a new or factory
remanufactured unit.
If these parts have to be ordered
and delivered after disassembly, there will be additional down
time.
Your time and financial constraints, and willingness to perform repairs
again will bear on whether you decide to replace additional
parts. Some transmissions at over 120,000 miles appear almost
new, and some appear to be prehistoric at only 40,000 miles.